If you are considering a dental implant at Valley Dental Turlock, knowing what happens at each step can ease a lot of anxiety. While every patient is different, the implant journey usually follows a clear, predictable path from consultation to final crown.
This guide walks you through that path step by step, including how to prepare, what placement day feels like, and what recovery looks like, so there are no surprises along the way.
Step 1: Consultation and planning
We begin with an exam and digital X-rays or 3D imaging to evaluate your jawbone and plan your treatment. We review your medical history, answer your questions, and go over financing options. We also check the health of your gums and neighboring teeth, since a healthy foundation helps the implant succeed. If a tooth still needs to be removed, or if bone grafting or the surgical placement of the implant is required, Dr. Ahmadi coordinates that step with a trusted local specialist, such as an oral surgeon or periodontist, and then completes your custom crown once the implant has healed. This planning stage gives you a clear picture of the timeline and cost before anything begins.
Step 2: Implant placement
When it is time to place the implant, the area is fully numbed for your comfort. Using the plan mapped out at your consultation, the titanium post is placed into the jawbone by your surgical specialist, and the site is closed to heal. The appointment itself is usually about an hour, depending on how many implants are being placed. Most patients are surprised by how routine and comfortable it is, and many compare the recovery to a simple tooth extraction rather than major surgery.
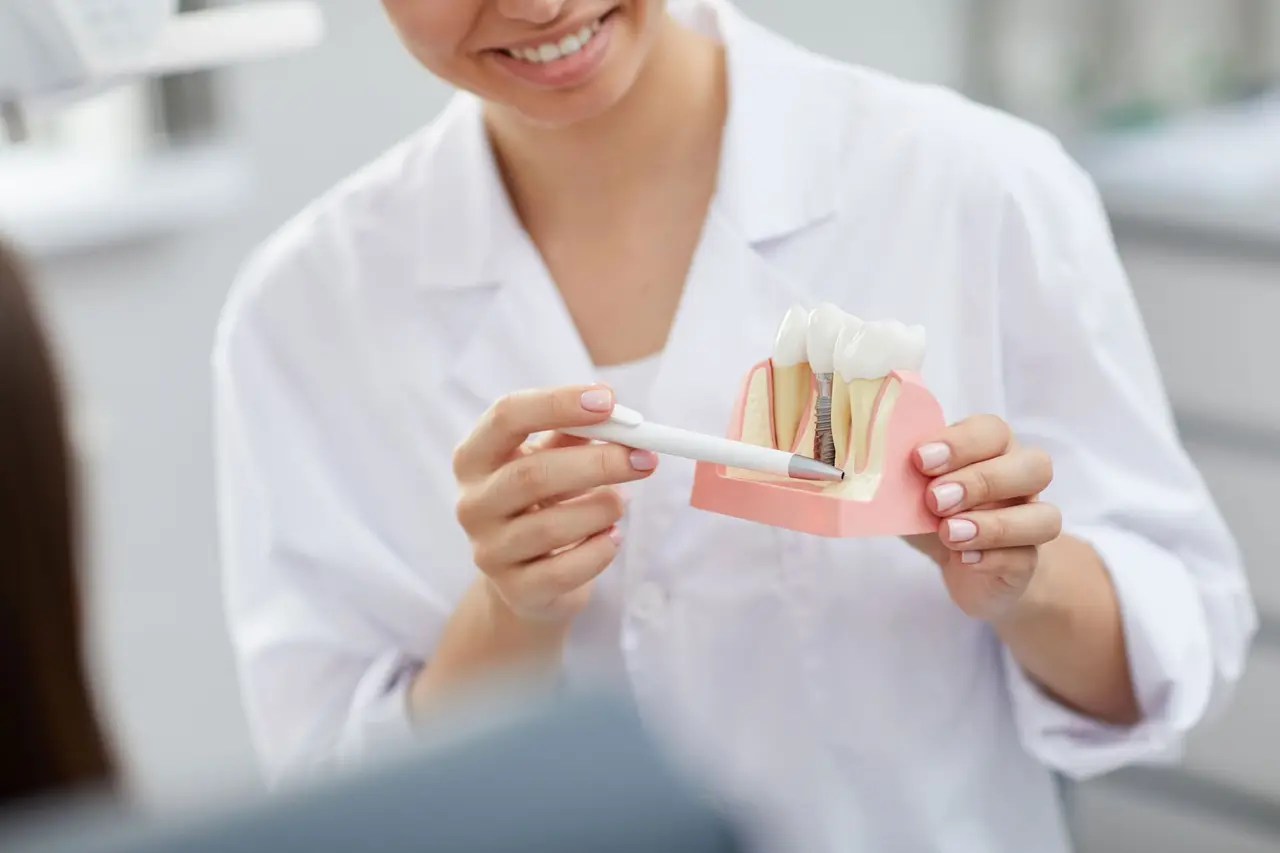
Step 3: Healing and the final crown
Over the next few months the implant fuses with your bone in a process called osseointegration. This is the quiet, important part of the journey, where the titanium post and your jawbone bond into a single, stable unit. During this time you go about your normal life, and in some cases a temporary tooth can be worn for appearance. Once healed, we attach a small connector (abutment) and your custom crown, completing your new tooth and matching it to your natural teeth in shape and color. We then keep it healthy with routine cleanings and exams.
How to prepare for placement day
A little preparation helps your appointment and recovery go smoothly. In the days before placement, keep these points in mind.
- Follow any instructions we give about eating, drinking, or medications before your appointment.
- Stock up on soft foods like yogurt, soup, smoothies, and mashed potatoes for the first few days.
- Pick up any recommended supplies, such as ice packs and over-the-counter pain relief.
- Plan a relaxed schedule for the rest of placement day so you can rest.
If you have questions about the process or financing beforehand, our team is glad to help. New to the practice? Review our new patient information to get set up.
Recovery and aftercare
Mild swelling or soreness for a few days is normal and usually managed with over-the-counter pain relief and ice. Stick to softer foods at first, keep the area clean, and follow our aftercare instructions. Call us right away if you have concerns; we are here throughout your recovery.
Aftercare tips for a smooth recovery
Most patients are pleasantly surprised by how manageable recovery is. These simple steps help healing along.
- Apply a cold pack to the cheek in short intervals during the first day to limit swelling.
- Rest for the remainder of placement day and avoid strenuous activity for a couple of days.
- Eat soft, cool foods at first and gradually return to your normal diet as you feel comfortable.
- Keep the mouth clean with gentle brushing and any rinse we recommend, avoiding vigorous rinsing right after surgery.
- Avoid smoking, which slows healing, and skip straws if we advise it.
If you notice heavy bleeding, increasing pain, or signs of infection, contact us promptly through our contact page. To learn how to keep your finished implant healthy for the long term, see our guide on how long dental implants last.